How to Make Lemon Drop Swirl Cold Process Soap
Dive into the zesty world of soap making with our guide on crafting Lemon Drop Swirl Cold Process Soap. This tutorial is designed for intermediate soap makers looking to add a refreshing twist to their soap collection. Follow along as we share step-by-step instructions, including tips and tricks, to ensure your soap making adventure is both enjoyable and successful. Difficulty: Intermediate
Yield: 14 Bars
Embrace the challenge and delight of creating your own Lemon Drop Swirl Soap. This guide is tailored for those who have a basic understanding of cold process soap making. Let's embark on this citrusy journey together, ensuring we incorporate the essence of homemade lemon soap recipes and the intricate beauty of drop swirl soap designs.
Step 1 – Gear Up for Safety
Dress in protective clothing, including long sleeves, pants, shoes, safety goggles, mask, and gloves. It's essential to work in an area that's well-ventilated and free from distractions, especially when dealing with ingredients for your homemade lemon soap recipe.
Step 2 – Make Lye Solution
Begin by measuring cold distilled water into a funnel pitcher. In a separate container, measure sodium hydroxide. Gradually sprinkle the sodium hydroxide into the cold water, stirring gently to prevent splashes, and take care not to inhale any fumes. It's important to remember the safety adage, "Snow falls on the lake," which means always add lye to water to avoid a dangerous reaction. After mixing, set it aside in a well-ventilated area to cool. Nearby, prepare sodium lactate in a small container, ready for use in your lemon cold process soap recipe.
Step 3 – Make Oil Solution
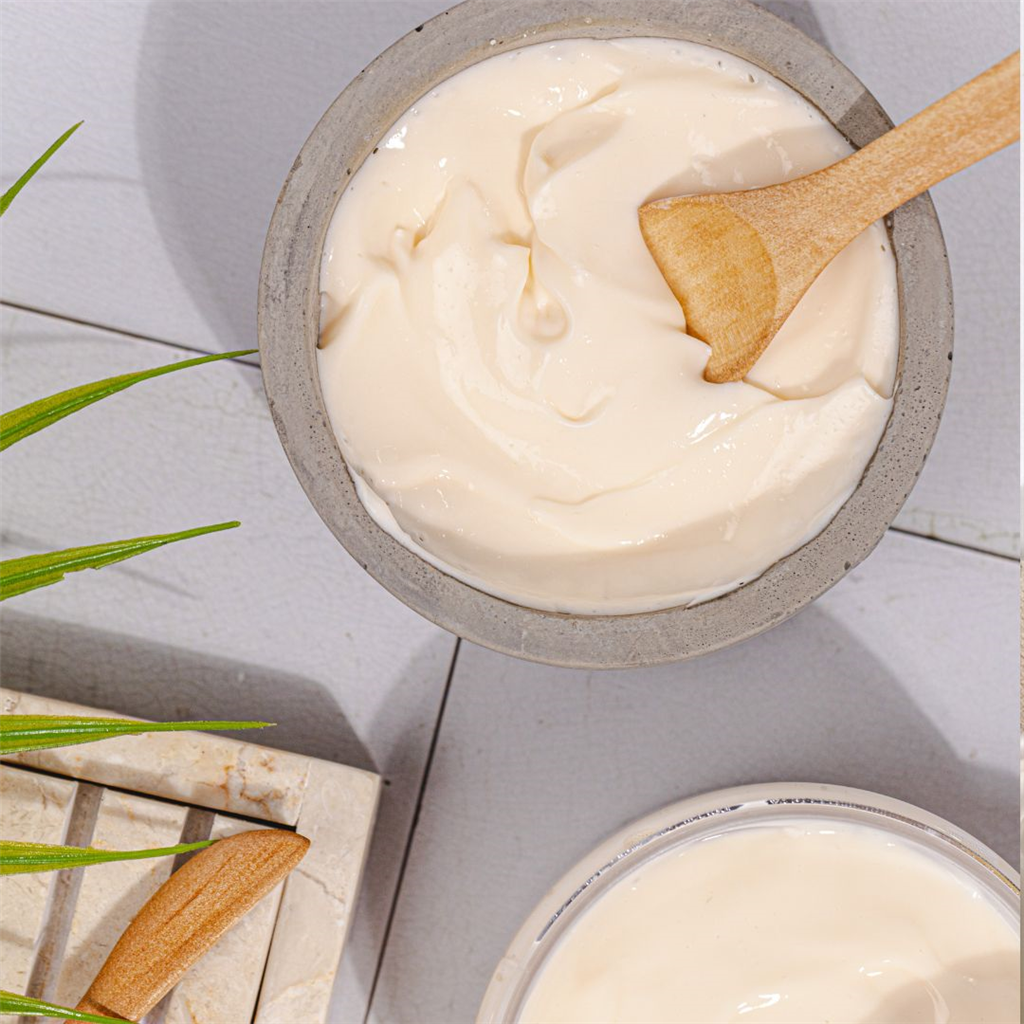
For the oil base of your diy lemon soap recipe, measure coconut oil into a 2-Quart Glass Mixing Bowl or a Microwavable Plastic Bowl. Zero out the scale and add lard. Melt the mixture in 30-second intervals until fully liquid. Meanwhile, prepare castor oil in a funnel pitcher, followed by carefully measured amounts of avocado and olive oil. Then, prepare the essential oil and fragrance blend in a separate container. Combine the liquid oils with the melted hard oils, ensuring clarity before integrating the essential oil and fragrance blend.
Step 4 – Prepare Colorant
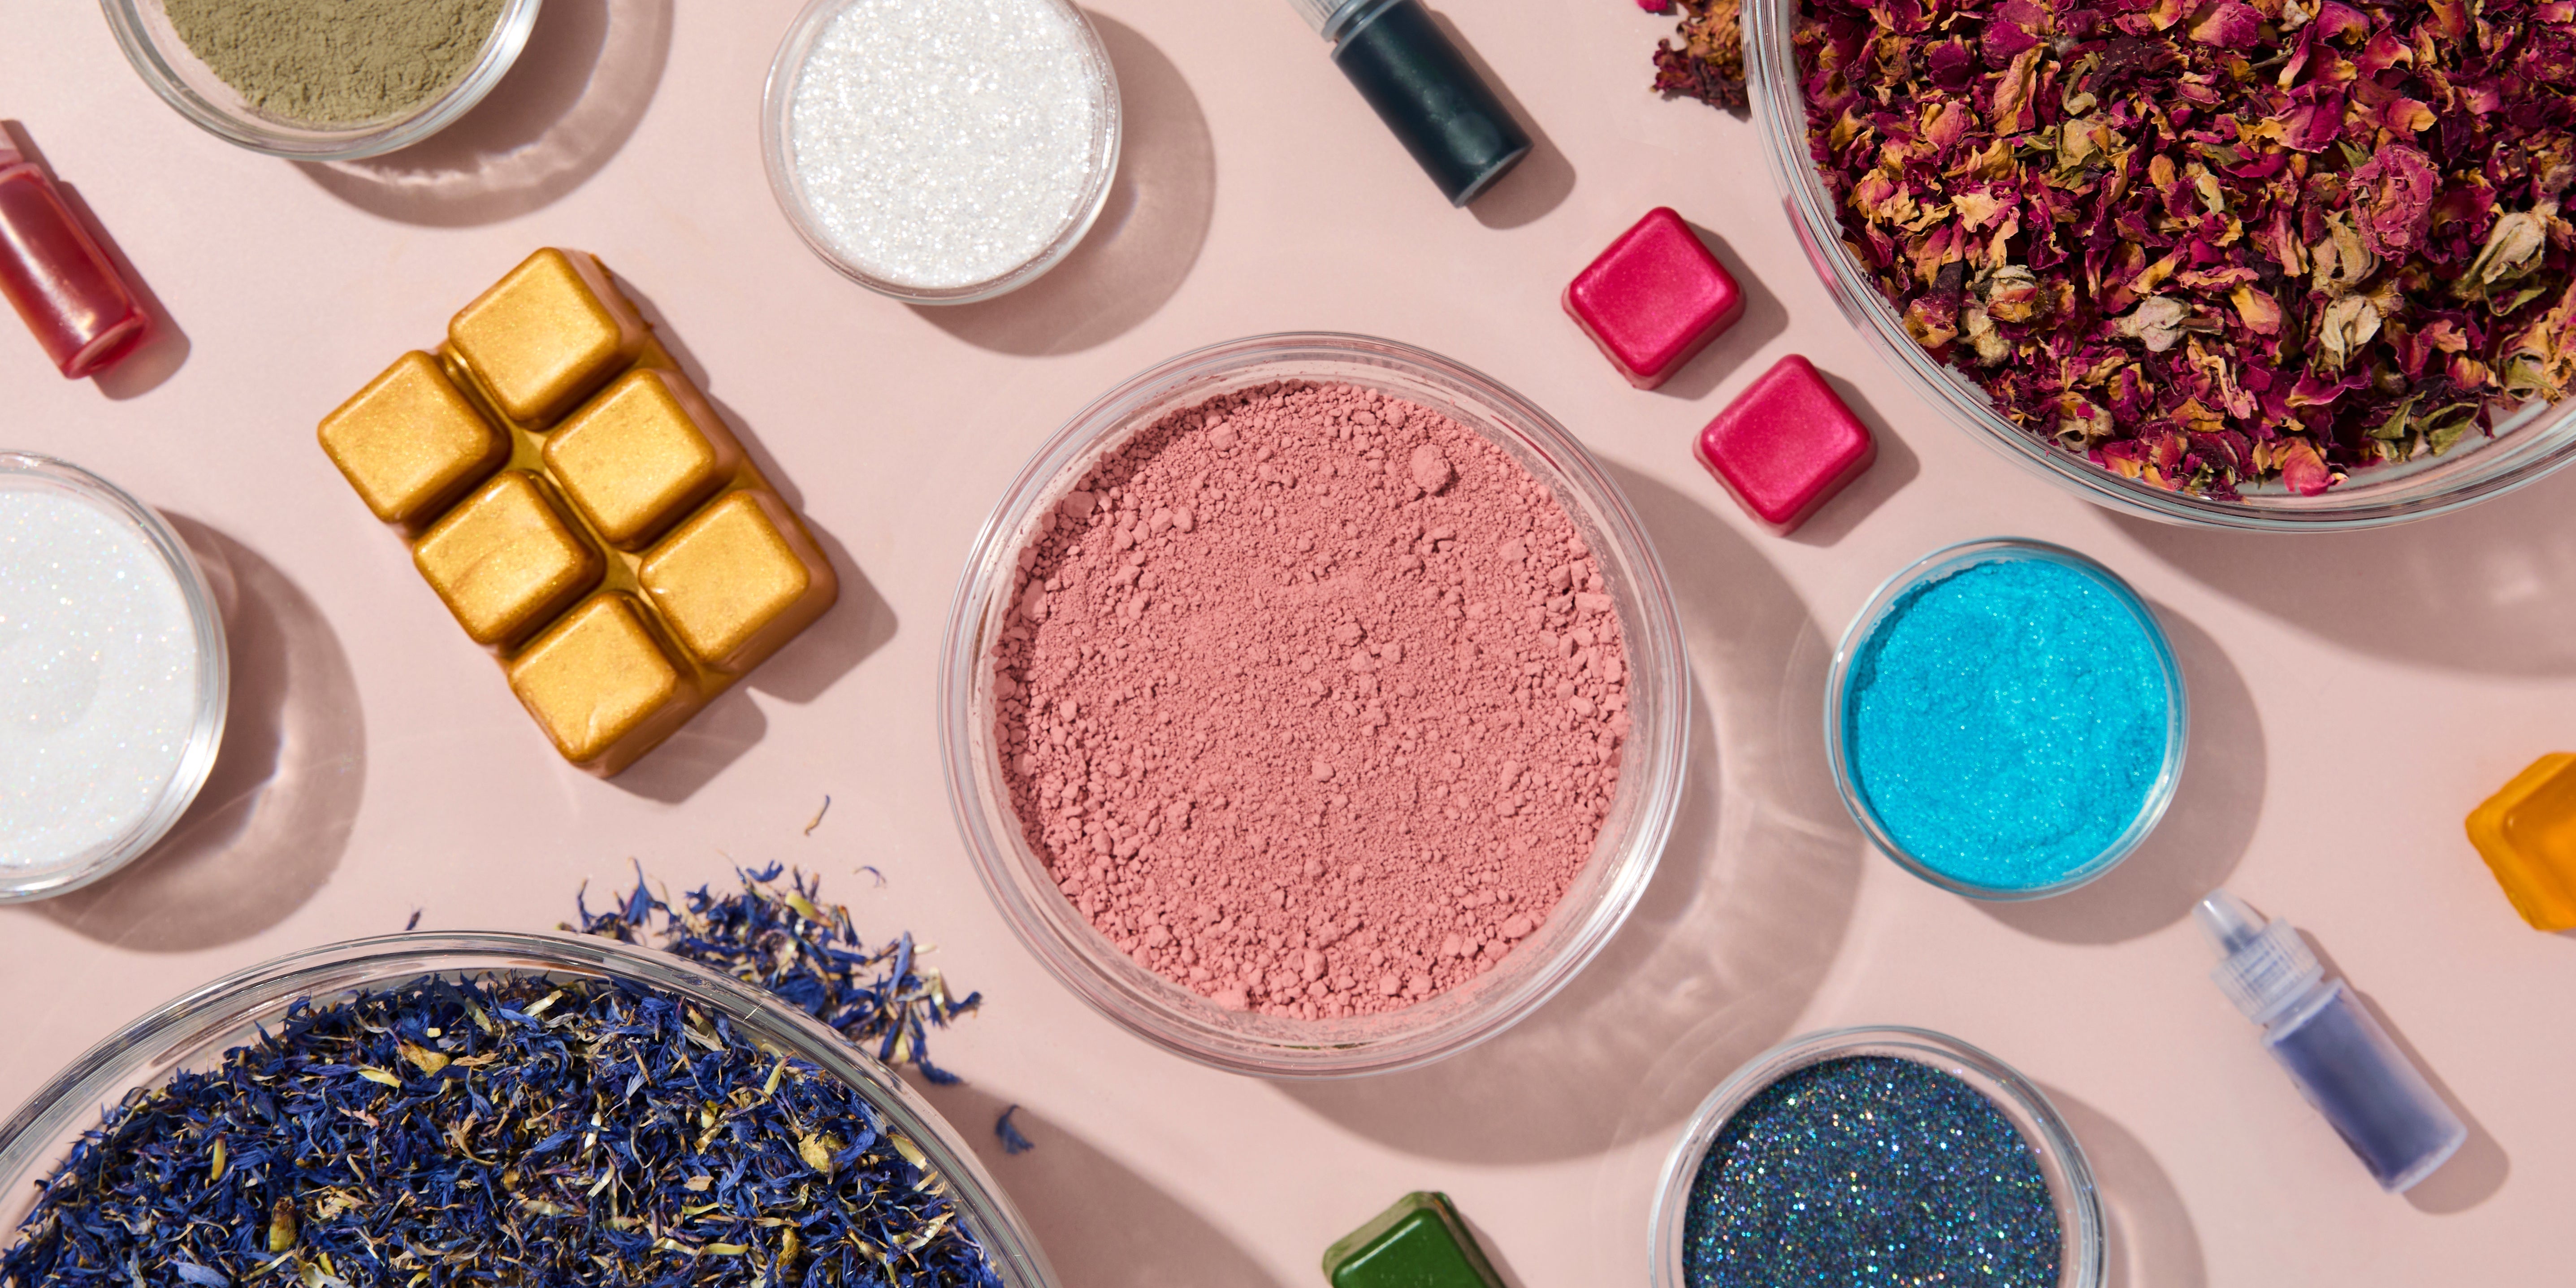
To add vibrant hues to your lemon soap recipe, prepare 5 zipper bags with specific colorants:
Step 5 – Make Soap
To encourage gelling, which is recommended for this cold process lemon soap recipe, preheat a heating pad. Once the lye and oil solutions reach temperatures between 85°- 95° F (29°- 35° C), add sodium lactate to the lye solution. Carefully combine the solutions, ensuring minimal air entrapment. Use a stick blender to reach emulsification, aiming for a thin, consistent batter.
Step 6 – Split & Color Batter
Distribute the soap batter into four separate funnel pitchers, reserving a portion for the white colorant, which is then blended into the remaining mixture in the main bowl. Sequentially color and mix the contents of each pitcher.
Step 7 – Pour Batter
After the mold is filled halfway with white soap batter, place the black batter lines down the length of the mold using a soap bottle. Using the rest of the soap batter with funnel pitchers, pour one color at a time from about 12” above the mold. Repeat this process until all batter is used, with just a very small amount used to top the soap with color splatters that are swirled.
Step 8 – Gel Phase
Place the molds on a heating pad, cover with plexiglass or cardboard, then seal with plastic wrap. Insulate further if necessary, adjusting the heating pad based on the ambient temperature to ensure a consistent gel phase, which enhances the soap's texture, color, and longevity.
Step 9 – Clean Up
Ensure containers are wiped clean before washing to minimize waste and ensure a tidy workspace. This step is crucial for maintaining hygiene and safety standards in soap making.
Step 10 – Unmold and Finish
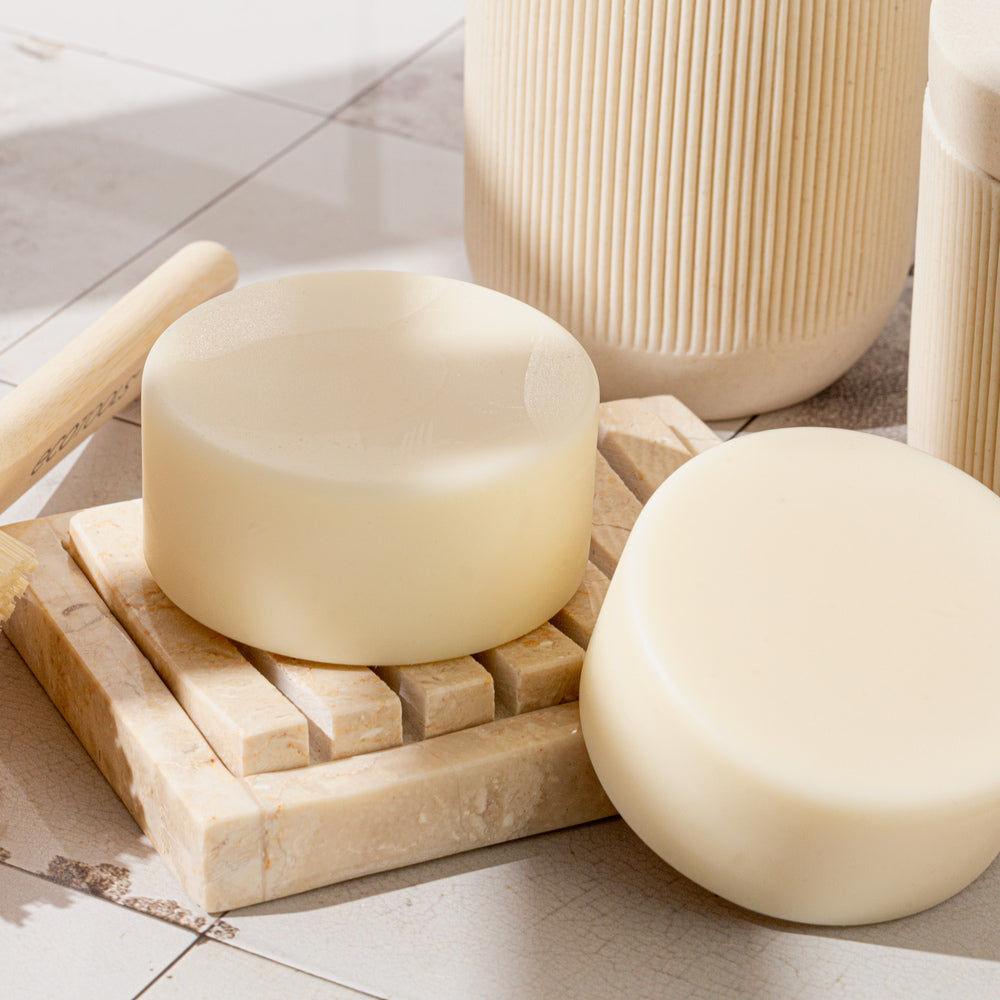
After a 48-hour cure time, if the soap releases easily, it's ready for unmolding. Cut the soap into bars, bevel the edges for a polished look, and allow them to cure for 4-6 weeks in a well-ventilated area before enjoying your vibrant, homemade lemon drop soap.
Throughout this process, remember that soap making is both an art and a science. Mistakes can happen, but they are opportunities to learn and improve. Whether you're crafting a lemon soap recipe for personal use or for your small business, each batch is a step towards mastering the art of soap making.
Incorporate these tips and tricks into your next soap making project and enjoy the refreshing, clean scent of Lemon Drop Swirl Cold Process Soap in your home or product line. Happy soap making!
Yield: 14 Bars
Embrace the challenge and delight of creating your own Lemon Drop Swirl Soap. This guide is tailored for those who have a basic understanding of cold process soap making. Let's embark on this citrusy journey together, ensuring we incorporate the essence of homemade lemon soap recipes and the intricate beauty of drop swirl soap designs.
- Prep Time / Clean Up: 30 Minutes
- Perform Time: 2 Hours
- Total Time: 2 Hours, 30 Minutes (extend if using gel phase, which is recommended)
- Cure Time: 4-6 Weeks
- Cold Distilled Water, Sodium Hydroxide (Lye), and optional Sodium Lactate for a hard, durable bar.
- A base oil mix of Coconut, Lard, Castor, Avocado, and Olive oils for a creamy lather.
- Lemon Sugar Fragrance and Lemongrass Essential Oil for that invigorating scent.
- Colorants like Titanium Dioxide, Yellow Oxide, Neon Yellow Electric Slide Powder, and more to achieve the vibrant lemon drop swirl effect.
- 11.7 oz / 332 g Cold Distilled Water (Water as a percent of oil weight: 25%)
- 6.6 oz / 186 g Sodium Hydroxide (Lye) (6% Super Fat/Lye discount)
- 3 teaspoons / 20 g Sodium Lactate 60% (Optional) (helps soap to harden and release from mold sooner) (1 teaspoon Per Pound of Oils (PPO)) If not available, dissolve 1/4 teaspoon salt per pound of hard (saturated) oils in distilled water and cool before adding lye. For this recipe use a scant 1/4 + 1/8 teaspoon.)
- 11.7 oz / 332 g Coconut Oil (25%)
- 14.0 oz / 399 g Lard (30%)
- 2.3 oz / 66 g Castor Oil (5%) (plus some for mixing colorants)
- 2.3 oz / 66 g Avocado Oil (5%)
- 16.4 oz / 465 g Olive Oil (35%)
- 2.9 oz / 82 g Lemon Sugar Fragrance
- 1.0 oz / 28 g Lemongrass Essential Oil
- 1-1/4 teaspoon Titanium Dioxide
- 1/8 teaspoon Yellow Oxide
- A heaping 1/8 teaspoon Neon Yellow Electric Slide Powder
- 1/4 teaspoon Lemon Twist Mica
- 1/2 teaspoon Groovy Green Mica
- 1/8 teaspoon and a heaping 1/4 teaspoon (divided) Neon Bright Green Powder
- 3-.15 scoops Chromium Oxide Green
- 1 teaspoon Smooth Coconut Carbon or Activated Charcoal
Step 1 – Gear Up for Safety
Dress in protective clothing, including long sleeves, pants, shoes, safety goggles, mask, and gloves. It's essential to work in an area that's well-ventilated and free from distractions, especially when dealing with ingredients for your homemade lemon soap recipe.
Step 2 – Make Lye Solution
Begin by measuring cold distilled water into a funnel pitcher. In a separate container, measure sodium hydroxide. Gradually sprinkle the sodium hydroxide into the cold water, stirring gently to prevent splashes, and take care not to inhale any fumes. It's important to remember the safety adage, "Snow falls on the lake," which means always add lye to water to avoid a dangerous reaction. After mixing, set it aside in a well-ventilated area to cool. Nearby, prepare sodium lactate in a small container, ready for use in your lemon cold process soap recipe.
Step 3 – Make Oil Solution
For the oil base of your diy lemon soap recipe, measure coconut oil into a 2-Quart Glass Mixing Bowl or a Microwavable Plastic Bowl. Zero out the scale and add lard. Melt the mixture in 30-second intervals until fully liquid. Meanwhile, prepare castor oil in a funnel pitcher, followed by carefully measured amounts of avocado and olive oil. Then, prepare the essential oil and fragrance blend in a separate container. Combine the liquid oils with the melted hard oils, ensuring clarity before integrating the essential oil and fragrance blend.
Step 4 – Prepare Colorant
To add vibrant hues to your lemon soap recipe, prepare 5 zipper bags with specific colorants:
- Titanium Dioxide for a bright white.
- Yellow Oxide, Blinded by the Light Neon Pigment, and Lemon Twist Mica for vivid yellow tones.
- Groovy Green Mica and Radioactive Green Neon Pigment for green shades.
- Chromium Oxide Green and more Radioactive Green Neon Pigment for dark green.
- Smooth Coconut Carbon or Activated Charcoal for a deep black.
Step 5 – Make Soap
To encourage gelling, which is recommended for this cold process lemon soap recipe, preheat a heating pad. Once the lye and oil solutions reach temperatures between 85°- 95° F (29°- 35° C), add sodium lactate to the lye solution. Carefully combine the solutions, ensuring minimal air entrapment. Use a stick blender to reach emulsification, aiming for a thin, consistent batter.
Step 6 – Split & Color Batter
Distribute the soap batter into four separate funnel pitchers, reserving a portion for the white colorant, which is then blended into the remaining mixture in the main bowl. Sequentially color and mix the contents of each pitcher.
Step 7 – Pour Batter
After the mold is filled halfway with white soap batter, place the black batter lines down the length of the mold using a soap bottle. Using the rest of the soap batter with funnel pitchers, pour one color at a time from about 12” above the mold. Repeat this process until all batter is used, with just a very small amount used to top the soap with color splatters that are swirled.
Step 8 – Gel Phase
Place the molds on a heating pad, cover with plexiglass or cardboard, then seal with plastic wrap. Insulate further if necessary, adjusting the heating pad based on the ambient temperature to ensure a consistent gel phase, which enhances the soap's texture, color, and longevity.
Step 9 – Clean Up
Ensure containers are wiped clean before washing to minimize waste and ensure a tidy workspace. This step is crucial for maintaining hygiene and safety standards in soap making.
Step 10 – Unmold and Finish
After a 48-hour cure time, if the soap releases easily, it's ready for unmolding. Cut the soap into bars, bevel the edges for a polished look, and allow them to cure for 4-6 weeks in a well-ventilated area before enjoying your vibrant, homemade lemon drop soap.
Throughout this process, remember that soap making is both an art and a science. Mistakes can happen, but they are opportunities to learn and improve. Whether you're crafting a lemon soap recipe for personal use or for your small business, each batch is a step towards mastering the art of soap making.
Incorporate these tips and tricks into your next soap making project and enjoy the refreshing, clean scent of Lemon Drop Swirl Cold Process Soap in your home or product line. Happy soap making!