Summer Celebration Layer Soap Recipe
Summer is the perfect time to explore fun and creative soap-making projects that make excellent handcrafted gifts or add a vibrant touch to your bathroom decor. This Summer Celebration Layer Soap, utilizing the melt and pour method, is the perfect project. By following this guide, you'll learn how to layer soap effectively to create visually stunning bars that embody the joyful essence of summer. Layering melt and pour soap involves a few steps to ensure each layer adheres properly without mixing, maintaining distinct, clean layers.
INFORMATION
The process of pouring layers of Melt and Pour Soap depends of a few factors:
DIRECTIONS
Step 1 – Make “Ice Cubes”
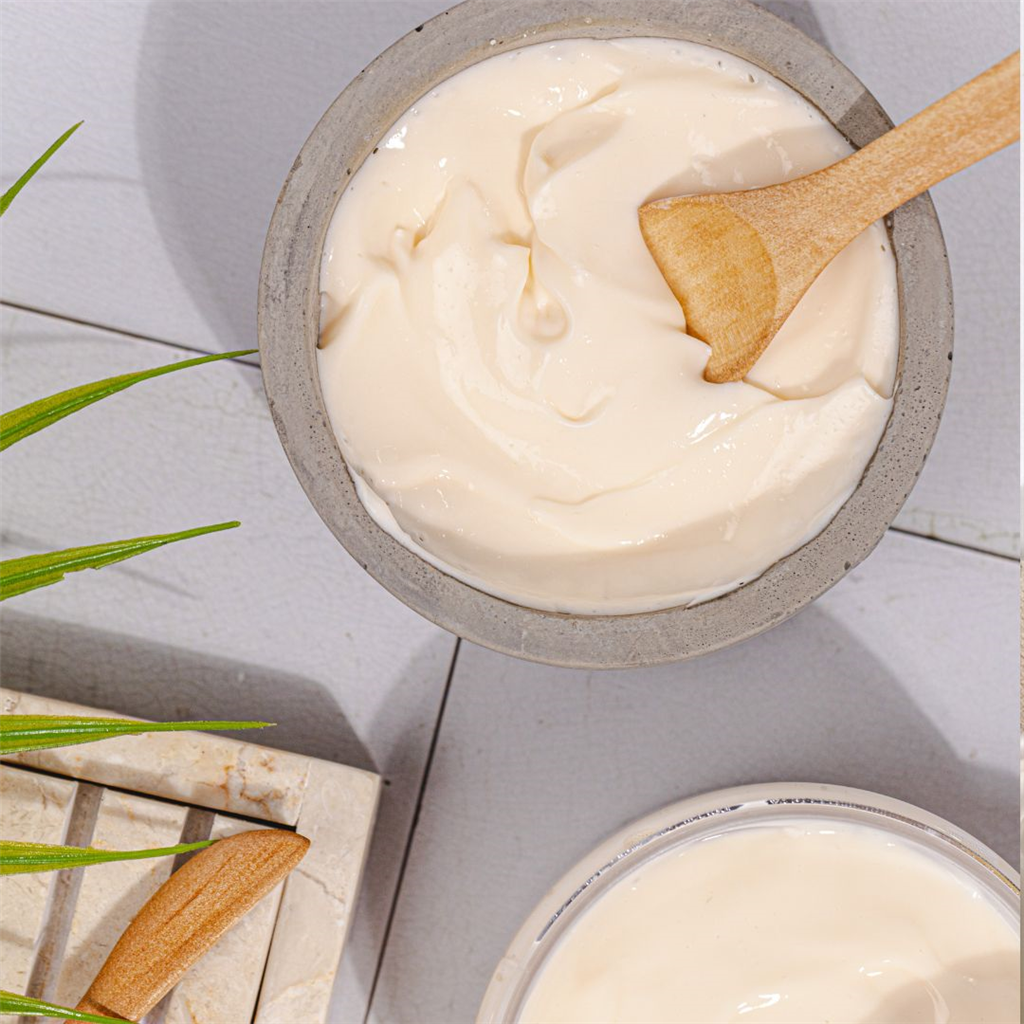
Cut 250 g of clear soap base and 30 grams of white soap base into smaller pieces (around a ½” to ¾” square) and place in funnel pitcher. Melt and stir in the microwave at 30-second increments until nearly melted. Add 3.5 ml fragrance oil, stir until nearly melted, and pour. (If it’s not fluid enough to pour microwave a short time and pour). Spray top with isopropyl alcohol, set timer for 25 minutes, and set pitcher aside for next step.
In the meantime cut 222 g of clear soap base.
When the timer rings, make sure soap is set and remove it from the mold. Cut unmolded soap into “ice cubes.” You can cut them into random or uniform shapes.
Step 2 – Make and Pour First and Second Layers (Clear and Blue)
Arrange a layer of “ice cubes” on the bottom of the mold.
Next, using the pitcher with the solidified soap from first step, add around one fourth of the cut clear soap base (not the “ice cubes”) from previous step and melt, add .75 ml fragrance oil. Stir and melt again if needed.
When the temperature of the melted soap is below 150° F, spray the “ice cubes” in the mold, pour them, and spray again.
Transfer the remaining cut clear soap base into the pitcher of just-poured soap. Melt and add 2.5 ml fragrance oil and 8 drops of Crystal Blue liquid colorant. When the temperature gets below 135° F, spray the molded soap and then pour the melted blue soap. Next, spray the top and spray the set-aside “ice cubes,” sprinkle a layer onto the melted soap, and spray again. Set the timer for 25 minutes.
Step 3 – Make and Pour Third Layer (Light Blue)
Put your pitcher with the solidified soap on the scale and zero it. Cut and weigh 222g of cubed clear soap base. Melt as above, and then add 3.5 ml fragrance oil and 1 drop of
- Prepare Your Workspace: Clean and organize your workspace. Have all materials within reach for an efficient soap-making process.
- Melt the Soap Base: Begin with the bottom layer of your soap. Cut your melt and pour the soap base into small chunks to ensure even melting. Use a microwave-safe container for microwaving in short bursts or a double boiler for melting the soap base on the stove. Stir occasionally to help the soap melt evenly without boiling.
- Color and Scent the Melted Soap: Once the soap base is melted, add your colorant and fragrance oil. Stir thoroughly to ensure the color and scent are evenly distributed throughout the soap.
- Pour the First Layer: Pour the melted soap into your mold. To avoid bubbles, spray the surface gently with rubbing alcohol immediately after pouring. Let this layer cool and begin to solidify. It should be firm to the touch but not completely hardened.
- Prepare the Next Layer: While the first layer is setting, start melting the next batch of soap base. This time, you can use a different color or type of base (clear or opaque) to create contrast.
- Check the First Layer: Before pouring the next layer, ensure the first layer is set enough to support the weight of the new layer. It should not be completely hard; a slight tackiness is ideal.
- Spray with Rubbing Alcohol: Spray the top of the set layer with rubbing alcohol. This step helps the layers adhere to each other, preventing them from separating once the soap is unmolded.
- Pour the Next Layer: Pour the second layer of melted soap over the first layer. Pour gently to avoid disturbing the set layer. Again, spray the top with rubbing alcohol to remove any bubbles.
- Repeat the Process: Continue this process for as many layers as you want, always ensuring the previous layer is set but slightly tacky before pouring the next one. Alternate colors and scents to create a unique and visually appealing soap.
- Let the Soap Set: Once all layers have been poured, allow the soap to cool and harden completely. Depending on the size of the soap and the ambient temperature, this may take several hours or overnight.
- Unmold and Enjoy: Gently remove the soap from the molds.
INFORMATION
- Difficulty: Intermediate
- Yield: 10 Bars
- Prep Time / Clean Up: 20 Minutes
- Perform Time: 2 Hours, 50 Minutes
- Total Time: 3 Hours, 10 Minutes
- Digital Scale
- Digital Thermometer or Infrared Thermometer (Infrared Thermometer is much easier with Melt and Pour Soap)
- 2 x Funnel Pitchers
- Spatula/Chopstick (for stirring)
- Pipettes
- Plastic Wrap
- Paper Towels
- 10″ Silicone Loaf Mold
- Timer
- Knife
- Vegetable Peeler (one that is dedicated to soap)
- Isopropyl Alcohol (91% was used in this tutorial, easily found in first-aid sections in pharmacies or supercenters)
- Bottle with Spray Top & Lid (for Isopropyl Alcohol)
- 3 lbs / 1360 g Clear Melt & Pour Soap Base
- 30 g White Melt & Pour Soap Base (Optional, for clear ice cubes)
- 21 ml Island Temptations Fragrance Oil
- Crystal Blue Liquid Colorant
- True Red Liquid Colorant
The process of pouring layers of Melt and Pour Soap depends of a few factors:
- Microwaving: When microwaving Melt-and-Pour Soap Base, it is important to keep the temperature relatively low, or the soap base can scorch. You can do this by microwaving for 30-second intervals and stirring in between. Toward the end of melting, use 10-second intervals. If you have a microwave with a defrost setting, it works even better. Set it for a half pound or the shortest time, start the microwave, and check periodically. Keep starting over until melted.
- Temperature: This Melt-and-Pour Soap Base starts to solidify at 130° F, so a good temperature for pouring layers is just above 130° F. The pouring temperature only has to be that low when pouring on top of another layer so as not to melt the previously poured layer.
- Stirring: When melting the soap base, try not to introduce air bubbles. Only gently stir. The best tool for this is a chopstick. A spatula will work fine, but a lot of the melted soap tends to solidify on it, causing frustration.
- Spraying Isopropyl Alcohol: Spraying isopropyl alcohol is done for two reasons. The first is to pop air bubbles. This is done sometimes after stirring your melted base as you see fit and, always immediately after pouring each layer. The top of the poured soap gets a skin on it pretty quickly. That is why it is important to quickly pop the bubbles. Don’t worry about getting the entire base out of the pitcher, just pour until it stops and quickly spray.
- Pouring: When pouring on top of another set layer, do not pour in one spot. Move the pouring spout as you are pouring to avoid breaking through the previous layer.
- Timing: Once you have poured and sprayed a layer, set the timer for 25 minutes. (If the ambient temperature is warm you may need to wait longer than that. The molded layer must be able to support the next layer, but it should still be warm. To test, with a gloved hand, gently press the poured layer in the center. Does it feel thick enough to support a hot layer of soap?
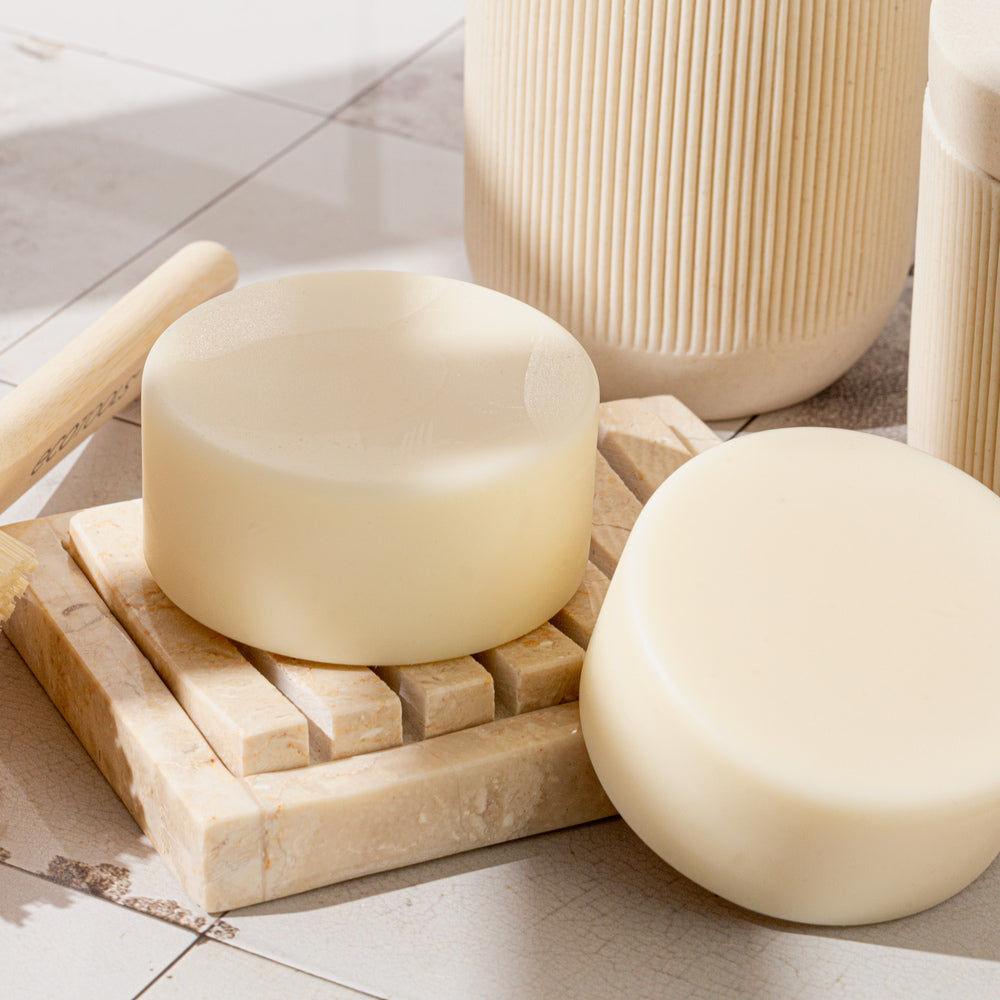
- Cutting: Don’t cut until the next day, and choose a knife that is not too thick. It works best to cut the loaf of soap on its side rather than cutting through the top of the loaf. Cutting through the top sometimes caused the layers to shift and separate.
DIRECTIONS
Step 1 – Make “Ice Cubes”
Cut 250 g of clear soap base and 30 grams of white soap base into smaller pieces (around a ½” to ¾” square) and place in funnel pitcher. Melt and stir in the microwave at 30-second increments until nearly melted. Add 3.5 ml fragrance oil, stir until nearly melted, and pour. (If it’s not fluid enough to pour microwave a short time and pour). Spray top with isopropyl alcohol, set timer for 25 minutes, and set pitcher aside for next step.
In the meantime cut 222 g of clear soap base.
When the timer rings, make sure soap is set and remove it from the mold. Cut unmolded soap into “ice cubes.” You can cut them into random or uniform shapes.
Step 2 – Make and Pour First and Second Layers (Clear and Blue)
Arrange a layer of “ice cubes” on the bottom of the mold.
Next, using the pitcher with the solidified soap from first step, add around one fourth of the cut clear soap base (not the “ice cubes”) from previous step and melt, add .75 ml fragrance oil. Stir and melt again if needed.
When the temperature of the melted soap is below 150° F, spray the “ice cubes” in the mold, pour them, and spray again.
Transfer the remaining cut clear soap base into the pitcher of just-poured soap. Melt and add 2.5 ml fragrance oil and 8 drops of Crystal Blue liquid colorant. When the temperature gets below 135° F, spray the molded soap and then pour the melted blue soap. Next, spray the top and spray the set-aside “ice cubes,” sprinkle a layer onto the melted soap, and spray again. Set the timer for 25 minutes.
Step 3 – Make and Pour Third Layer (Light Blue)
Put your pitcher with the solidified soap on the scale and zero it. Cut and weigh 222g of cubed clear soap base. Melt as above, and then add 3.5 ml fragrance oil and 1 drop of