Help & How Tos

How to Make Lip Balm Scrub

Article

How to Make Lip Balm Scrub
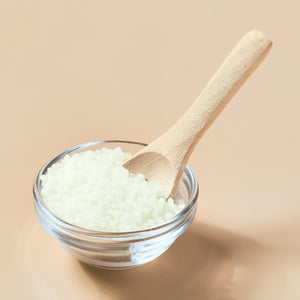
Skincare for the lips! We take care of our skin, and now it's time to take care of our lips with an easy-to-make exfoliating lip scrub recipe. This tutorial shows you how to make a moisturizing and skin-loving lip balm scrub. It's perfect for gentle exfoliation, making your lips smooth and soft. This exfoliating lip scrub recipe will make approximately 10 to 11 jars of lip scrub. Supplies and Equipment Needed: Mini-Melting Pot or Microwave (if no melting pot) Spoons or butter knives Rubber gloves Glass measuring cup 3 ounces Sugar (use a super fine grade – it's gentler for an exfoliating lip scrub recipe) Digital scale (not shown) Disposable pipettes 10 ml. Natural Polypropylene Jars w/Natural Caps 2 ounces Natural Lip Balm Base 1 ounce Apricot Kernel Oil Lip balm flavoring oil Step 1:Place the glass container on the digital scale and tare out the container (zero out the scale). Measure 2 ounces of the Natural Lip Balm Base.Step 2:Measure one ounce of Apricot Kernel Oil and add this to the container.Step 3:Slowly melt the lip balm base in a microwave for 30 seconds at a time until fully melted. Do not overheat! Slowly stir between each 30 seconds. Optional: If you have a Mini Melting Pot, add the measured lip balm base to this pot instead of using the microwave.Step 4:You can add up to 3% of lip balm flavor oil to the base. Start with 1%, and if you like a stronger scent, work your way up to 3%. We chose to use 1% for this tutorial, so we added 18 drops of Coconut Milk and Peaches flavor oil to the melted balm base using a disposable pipette. Stir until fully incorporated.For 1 oz of balm: 6 drops = 1% 12 drops = 2% 18 drops = 3% Step 5:The melted base should be cool enough at this point to add sugar so that it won't melt. If it's too hot, keep stirring slowly until it cools off. Measure 3 ounces of sugar and add this to the melted base to create the perfect lip scrub recipe.Step 6:Stir the mixture thoroughly and keep stirring slowly until it starts to thicken and cool off a bit more. This will keep the sugar suspended in the mixture and prevent it from settling on the bottom.Step 7:Using the 10 ml. Natural Polypropylene Jars, slowly fill each jar to the top. You can either pour the mixture directly into the jars or spoon in the mixture.Step 8:Let it set completely before capping (about 1 – 2 hours). If you add caps before the product has completely cooled, this can cause condensation build-up.This lip balm scrub recipe is super easy to customize to your preferences. If you want it stiffer, add more Natural Lip Balm Base. If you want it softer, add more carrier oil. You can adjust the sugar amount depending on your preference for exfoliation. Experiment with different sugars and carrier oils such as Grape Seed Oil, Golden Jojoba Oil, or MCT (Fractionated Coconut Oil) to personalize your exfoliating lip scrub recipe! Using a clean finger, scoop a little bit out of your jar and gently scrub over your lips in a circular pattern. Wipe off lips with a warm washcloth or rinse off with warm water and pat dry. Apply one of your favorite lip balms or lip balm lip scrub, and you're all set—an instant lip spa!
How To Drop Swirl Cold Process Soap Video

Article

How To Drop Swirl Cold Process Soap Video
Learn how to perform a drop swirl with cold process soap in this short video. We used our Vanilla Fig CP Loaf Recipe to perform this interesting bar soap! The bottom of the bar is colored by the vanilla content in our fragrance, and we left the top part unscented and used mica powders for the beautiful colors. Watch to see how we created this pretty design in cold process soap.
How To Make Lotion Video

Article

How To Make Lotion Video
Get started with lotion making by learning how to use lotion bases. This video walks you through the basics of working with lotion bases and adding fragrance to customize your lotion. We provide a simple recipe so you can easily make four jars of lotion.
Making Baby Bunny MP Soaps

Article

Making Baby Bunny MP Soaps
These chocolate scented bunny soaps will make the perfect basket stuffers. Just be sure your label says "SOAP" so they don't get confused with the real thing!  Or, switch out the fragrance and make these an adorable baby shower favor. Your guests will love them!
Guide to Swapping Butters & Oils in Lotion Recipes

Article

Guide to Swapping Butters & Oils in Lotion Recipes
When it comes to crafting lotions, the inclusion of various butters significantly impacts the final product. Butters like shea, cocoa, and mango are beloved for their nourishing properties. However, when lotions contain more butter than oil, they tend to be richer and more emollient. This richness provides intense hydration, making them ideal for dry, parched skin in need of deep moisturization. On the flip side, oils play a crucial role in lotion formulations, especially when they outnumber the butters. Oils such as jojoba, almond, and coconut offer lightweight hydration and quick absorption, leaving the skin feeling soft and supple. Lotions with higher oil content are perfect for daily use, particularly in warmer weather or for those with oily or combination skin types. Are you looking to customize your lotion recipe to suit your specific needs or preferences? The good news is that you have the freedom to swap any oil for any oil, any butter for any butter, any oil for any butter, or any butter for any oil. This versatility allows you to tailor your lotion precisely to your liking, whether you desire a heavier, more indulgent formula or a lighter, fast-absorbing one.Perhaps you've come across a lotion recipe that calls for ingredients you don't have on hand, or you're itching to experiment with new oils and butters. Fear not! By interchangeable oils and butters, you can create a lotion that meets your unique requirements, regardless of the season or your skin's changing needs. When selecting alternatives to butter or oil for your lotion recipe, consider factors such as skin type, climate, and desired skin feel. For instance, if you prefer a lightweight, non-greasy lotion, opt for oils like grapeseed or sunflower. Alternatively, if you're seeking a richer, more indulgent texture, shea or cocoa butter would be excellent choices. Once you've determined which oils and butters best align with your preferences and skin needs, it's time to put your knowledge into action. Start by selecting a lotion recipe as your base and then swap out the oils and butters according to your desired substitutions. Be sure to make a small test batch to gauge the texture, absorbency, and overall feel of the lotion before committing to a larger batch. The world of natural oils and butters is vast and diverse, offering a wide array of options to explore. From exotic shea and mango butter to nourishing almond and avocado oil, there's no shortage of ingredients to incorporate into your homemade lotions. Don't be afraid to mix and match different oils and butters to create unique formulations tailored to your skin's specific needs. With the freedom to swap butters and oils in your lotion recipes, the possibilities are endless. Whether you're looking to create a luxurious body butter for dry winter skin or a lightweight moisturizer for summer, experimenting with different ingredients allows you to unleash your creativity and craft custom skincare solutions that cater to your individual preferences. TEST BATCH STEP 1 – BASIC LOTION RECIPELet's start with our Basic Body Lotion Recipe as a springboard for testing. Here is the ingredient list for this recipe:Heated Oil Ingredients 0.53 oz / 15 g Shea Butter, Refined (5%) 1.7 oz / 48 g Avocado Oil (16%) 0.53 oz / 15 g Emulsifying Wax, NF (5%) 0.21 oz / 6 g Stearic Acid (2%) Heated Aqueous Ingredients 0.32 oz / 9 g Glycerin (3%) (Available at pharmacies) 0.21 oz / 6 g Sodium Lactate Crystals (2%) 6.78 oz / 192 g Distilled or Deionized Water (64%) Cool Down Ingredients 0.21 oz / 6 g Fragrance Oil or Essential Oils (2%) 0.1 oz / 3 g Germaben II Preservative (1%) This recipe makes 300g of lotion which is a bit big for a test batch. For this purpose, it may be much more reasonable to make a 100g batch. To do this, take the percentage of each ingredient and use an equal number of grams. (For instance, this recipe uses 2% stearic acid. In a 100g test batch, you would use 2g.) This recipe calls for 16g or oil and 5g of butter for 21g total. You can substitute this with one or more of the butter or oil of your choice. You will want to use small heatproof cups, or beakers that are 200-300 mL in size to facilitate easy mixing. Additionally, it's difficult to use a full-size stick blender to mix small batches. Instead, mix your batches with a mini cordless mixer.TEST BATCH VARIATIONS – SWAPPING BUTTERS & OILSLet's look at some examples of test batches:Original Recipe:Oils and/ or Butters Used: 5% Shea Butter and 16% Avocado OilSkin Feel: This makes a medium-thick lotion. The shea butter adds some richness and greasiness, but the drier feeling of the avocado oil balances it.What This Lotion Is Good For: This is a nice general-purpose lotion. It would be nice to use it year-round on many different skin types.Variation 1:Oils and/or Butters Used: 5% Mango Butter and 16% Hempseed OilSkin Feel and Other Properties: This cream is a tiny bit thicker than the original recipe but has a remarkably drier feel thanks to the polyphenols and tannins in both the mango butter and the hempseed oil. It's also a little bit draggy from the mango butter. And check out that smashing green color!What This Lotion Is Good For: This lotion is also a good year-round lotion for lots of types of skin. The big difference from the original is that is far less greasy, which you may prefer.Variation 2:Oils and/ or Butters Used: 5% Sunflower Oil and 16% Organic Golden Jojoba OilSkin Feel and Other Properties: While still fairly thick, this lotion flows a little more than the original. Both oils used are very lightweight on the skin and the jojoba oil absorbs quickly and feels dry. This lotion has a wonderful glide on the skin and a nice pale golden color.What This Lotion Is Good For: This is a great lotion for summer legs! It glides over the skin and leaves a nice sheen without feeling heavy or greasy. Because sunflower and jojoba oils are non-comedogenic, this might be a great choice for post-shaving.Variation 3:Oils and/or Butters Used: 5% Cocoa Butter and 16% Shea ButterSkin Feel and Other Properties: This lotion has a creamy-greasy feel (in a good way!) from the shea butter and a protective, occlusive feel from the cocoa butter. Because unrefined butter were used, you can smell an earthy, chocolatey scent before adding the fragrance oil. Oddly enough, it's not appreciably thicker than the original, despite using 100% butters. It is, however, a lot heavier on the skin.What This Lotion Is Good For: This would be a nice cream for winter elbows, knees, and feet. The cocoa butter and shea butter would prevent moisture loss in wintery skin.
In The Pot Swirling Cold Process Soap Video

Article

In The Pot Swirling Cold Process Soap Video
In this video we show how to perform the 'In The Pot Swirl' with cold process soap. We colored our soap batter with three colors; Gingerbread Brown Mica Powder, Shimmering Dark Gold Mica Powder and Matte White Pigment Powder; to create these beautiful Salted Caramel Macchiato Cold Process Soap Bars. We love this swirling technique because of how easy it is to accomplish and how intricate and beautiful the final results are.
Learn to Make: Liquid Hand Soap From A Base

Article

Learn to Make: Liquid Hand Soap From A Base
Liquid soap can be tricky to make from scratch, but from a base it's easy! There are two basic types of liquid hand soap: foaming hand soap and regular hand soap. Use a foamer bottle and top set for foaming hand wash and a plastic bottle and pump top for regular hand wash.
Making Peppermint Candy MP Soap Video

Article

Making Peppermint Candy MP Soap Video
This video shows melt and pour soap making secrets for making Peppermint Candy Soap. These cute soaps look like peppermint candies, and are perfect for the holidays! A wonderful hostess gift or party favor. We used Bath Bomb Red Powder Color for our red color and Peppermint Candy Fragrance Oil for our scent. Feel free to put your own spin on it with a different color or scent.
Winter Fragrance Formulator Blending Lesson

Article

Winter Fragrance Formulator Blending Lesson
This lesson guides you in using the Fragrance Formulator Winter Blending Set to create your own unique bottles of fragrance. We have provided blending suggestions to kick-start your creativity.
How to Make Toy Soap Bars: A Fun Project for Kids

Article

How to Make Toy Soap Bars: A Fun Project for Kids
Making toy soap bars is a fun and creative way to get kids excited about bath time. By embedding small toys into clear soap bars, you can create a personalized and interactive gift that's perfect for party favors, gifts, or just everyday use. This beginner-friendly tutorial will guide you through the process with easy-to-follow steps. Supplies and equipment needed:Microwave safe glass containerSharp knife to cut soap base into cubesSpray bottle with rubbing alcoholButter knivesRubber glovesBasic Rectangle Soap MoldBasic Square Mold Disposable pipetteThermometer to monitor soap temperature16 oz Ultra Clear Melt & Pour soap baseVariety of Gel Soap colorantsApricot and Honey Fragrance Oil Step 1: Melt the Soap Base Measure and Melt: Cut 16 ounces of Ultra Clear Melt and Pour soap base into cubes and place in a microwave-safe container. Melt in 30-second intervals, stirring in between, until fully melted. Make sure the soap temperature is between 140-145 degrees Fahrenheit before adding any other ingredients.Step 2: Add Color and Fragrance Coloring: Add 2-3 drops of your preferred Gel Soap colorant and stir slowly to avoid bubbles. Fragrance: Add 6 ml of Apricot and Honey Fragrance Oil and stir until the soap is clear and well-mixed. Step 3: Embed the Toys Prepare the Molds: Pour about 1/2 ounce of the colored and scented soap into each mold cavity. Spritz with alcohol to eliminate bubbles. Place the Toys: Spritz the small toys with alcohol, then place them face down in the soap. Let the soap harden for 2-4 minutes. Step 4: Pour the Final Layer Seal the Toys: Spritz the soap and toys with alcohol, then slowly pour more soap into the molds until the toys are fully submerged. Spritz the top again to remove bubbles.Step 5: Let the Soap Set Setting Time: Allow the soap to harden for 3-4 hours or overnight. Once firm, gently remove the toy soap bars from the mold. Safety First: Ensure that the toys you use are safe for children and do not have any sharp edges. Remember, kids toy soap is not suitable for children under 3 years of age due to potential choking hazards. Customize for Themes: Create themed toy soap bars by choosing toys, colors, and fragrances that match the event. For example, use rubber ducks and yellow colorant for a baby shower, or dinosaurs and green colorant for a dinosaur-themed party. Gift Ideas: Package the toy soaps in clear cellophane bags with a ribbon for a cute, ready-to-gift item. These make great party favors, stocking stuffers, or small gifts for holidays and birthdays. Can I use any soap base for making toy soap bars?It's recommended to use an Ultra Clear Melt & Pour soap base to ensure the toys are visible. Other soap bases might obscure the embedded toys.Can I add glitter or other decorative elements to the toy soap?Yes, you can add cosmetic-grade glitter or other small decorative elements, but ensure they are safe for skin contact and won't scratch or irritate.What if the soap doesn't come out of the mold easily?If the soap sticks to the mold, you can place the mold in the freezer for a few minutes to help release it.Can I make toy soap bars with multiple layers of different colors?Yes, you can create multi-colored toy soap bars by pouring different colored layers of soap one at a time. Allow each layer to set slightly before pouring the next to prevent the colors from blending. This can create a visually appealing striped or layered effect.Can I use essential oils instead of fragrance oils in toy soap bars?Yes, you can use essential oils, but make sure they are skin-safe and properly diluted. Essential oils can add a natural scent to the soap, but some oils may not mix as easily as fragrance oils, so additional stirring might be needed.
Pet Spritz (from a base) - Simple Steps for Beginners

Article

Pet Spritz (from a base) - Simple Steps for Beginners
This helpful guide will show you 'How To Make' Pet Spritz using simple steps for beginners. 
Making Beach Ball Bath Bombs

Article

Making Beach Ball Bath Bombs
Making Beach Ball Bath Bombs is a perfect summer project! Your summer bath and room will fill with the scent of banana, coconut, pineapple and mango fill the air.